Source Code
The source code for this application is available on Github at https://github.com/tomjonesdev/BlazorWasmAuth0ContentfulDemo
Comments & Suggestions
Do you have any comments or suggestions which could improve this guide for others, or are there any parts which need updating, or correcting? If so, please get in touch by emailing me at contact@tomjones.dev.
Introduction
We will be creating a .NET Core hosted Blazor WASM application, which is made up of both the client application the user interacts with, and the supporting API which handles things like authentication and communicating with Contentful to fetch/save data. The finished application will consist of a single page on top of the boilerplate Blazor template, showing a form to create new tasks, and a list of existing tasks with options to mark each task as completed, or delete it. This tutorial will focus on the back-end code, so we will not be concerned with making it pretty with CSS etc.
Assumptions
- Moderate familiarity with ASP.NET Core MVC/C#
- Moderate familiarity with HTTP requests/responses
- Familiarity with the OIDC authentication flow and Blazor is beneficial but not required
Steps
- Create a project in Visual Studio
- Create an Auth0 account
- Configure the Client application
- Configure the Server/API application
- Set up Contentful and create a TodoItem model
- Configure the application for use with Contentful
- Fetch data from Contentful
- Display the Contentful response on the front-end
- Add functionality to create, update and delete tasks
Create a project in Visual Studio
Auth0 provide several Visual Studio templates to help developers get started using their authentication platform.
Start by opening up a terminal of your choice and install the templates using
dotnet new install Auth0.TemplatesOpen Visual Studio, create a new project. You should be able to filter the project type to "Auth0", then select the Blazor WASM option and proceed.
Leave the rest of the fields as the defaults for now and create the project.
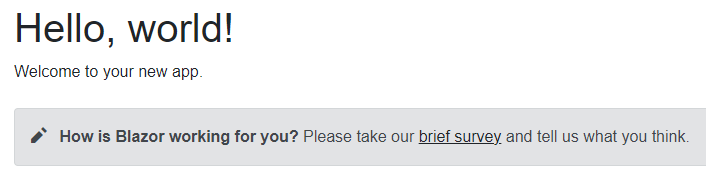
Set the Server project as the startup project and run the application. Once fully loaded, if all is working as expected you should see the standard Blazor WASM template, with a few minor changes, and a paragraph stating that "You're not authorized to reach this page. You need to log in." If you try to navigate to the Login page you'll see the following message:
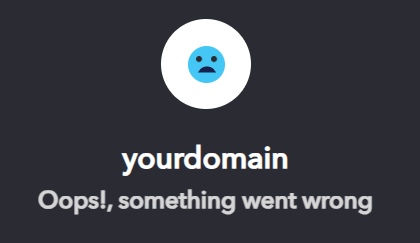
Go back to the home page and make a note of the URL and port of the running application (e.g. https://localhost:7193/).
Create an Auth0 account
- Navigate to auth0.com and create a new account if you don't already have one, signing up provides a 22-day free trial
- Select the appropriate "Account Type" and proceed. If relevant, check the box for advanced settings - I'm based in the UK so I'll change the data region from the US default. Select the appropriate region and proceed to create the account
- Check your emails and follow the link to verify your account.
Configure the Client application
- From the main menu, select Applications and Create Application
| Property | Value |
|---|---|
| Name | Todo App |
| Type | Single Page Web Applications |
Once created, go to the Settings tab and note down your Domain and Client ID, these will be needed to configure the app in the new project. Scroll down to Application URIs and add the following, ensuring the URL/port matches your new app:
| Property | Value |
|---|---|
| Allowed Callback URLs | https://localhost:7193/authentication/login-callback |
| Allowed Logout URLs | https://localhost:7193 |
Now, go back to your project in Visual Studio, and under the Client project, open the appsettings.json file and replace the Authority and ClientId fields with the Domain and Client ID values you noted down earlier, ensuring the former is still a valid URL prefixed with "https://", then save the changes.
Configure the Server/API application
Back in the Auth0 dashboard, from the main menu, select Applications, APIs, then
| Property | Value |
|---|---|
| Name | Todo API |
| Identifier | https://api.tomjones.dev |
| Signing Algorithm | RS256 (default) |
Go back to Visual Studio and still in the Client project's appsettings.json, change the Audience value to match the value entered for Identifier above.
Next, open the appsettings.json in the Server project and change the Domain and Audience values to match those used above (Domain should exclude the "https://" prefix this time because of how the templated Program.cs is configured).
Refresh the WASM app, navigate to Login, and you should be redirected to the Auth0 login page.
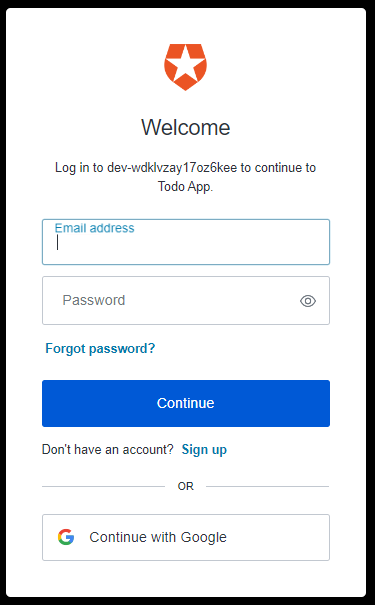
This application has no users yet, so click "Sign up" and enter an email address and password, then hit Accept to give the Todo App permission to access this new account. Once this is complete, you should be returned to the app and see a different message - check your emails for a verification link to confirm the account.
Set up Contentful and create a TodoItem model
We will be storing our app data using the Contentful CMS, which provides various APIs to manage and retrieve our data programmatically.
If you don't already have an account, create one here: https://www.contentful.com/sign-up/
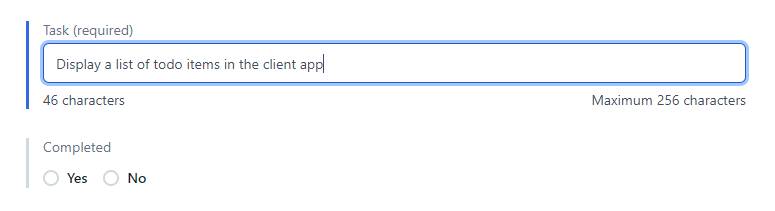
Log in and navigate to Content model, click , then on the popup. If you're unfamiliar with Contentful, a content model is the equivalent of a .NET class definition, so we'll define the type with the following properties:
| Property | Value |
|---|---|
| Name | TodoItem |
and select "Text" as the type
| Property | Value |
|---|---|
| Name | Task |
| Type | Short text, exact search |
| List | unchecked |
| Property | Value |
|---|---|
| Settings > This field represents the Entry title | checked |
| Validation > Required field | checked |
with a type of Boolean
| Property | Value |
|---|---|
| Name | Completed |
| Default value > No | checked |
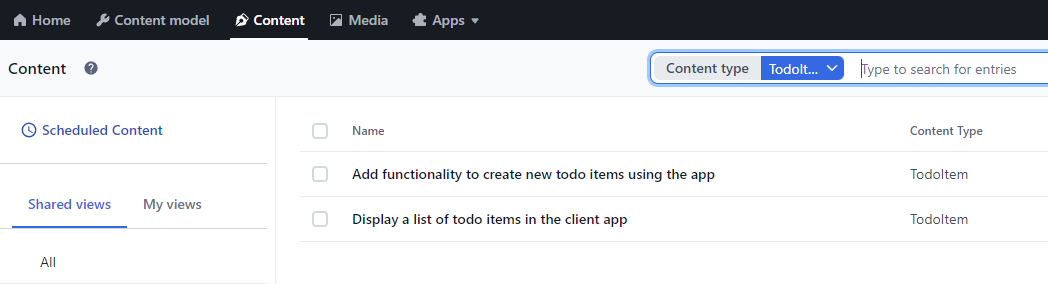
Now we'll create a few todo items via the Contentful UI - these will be displayed when we implement the first method to read from the CMS.
Navigate to Content, then "Add entry". We'll just add two for now, so create a new item and hit Publish (Completed can be left alone as this will default to "No") - navigate back to the Content list to create additional entries.
Configure the application for use with Contentful
Before heading back to Visual Studio, we'll need the details which will allow us to communicate with the CMS.
Go to Settings > API keys and under the "Content delivery / preview tokens" tab click "Add API key", give it a meaningful Name, such as "Todo App Key", and make a note of the Space ID, Content Delivery API - access token, and Content Preview API - access token, then press Save.
Navigate back to the list of APIs, then select the "Content management tokens" tab, click "Generate personal token", and give it a meaningful Token name, such as "Todo App management key", click Generate, and make a note of the value.
Now head back to Visual Studio, and using either the NuGet Package Manager or your terminal of choice, add the "contentful.aspnetcore" package to the Server project.
Still in the Server project, find the appsettings.json and add the following block of JSON, replacing the top 4 values with those noted above:
"ContentfulOptions": {
  "DeliveryApiKey": "<access_token>",
  "ManagementApiKey": "<cma_access_token>",
  "PreviewApiKey": "<preview_access_token>",
  "SpaceId": "<space_id>",
  "UsePreviewApi": false,
  "MaxNumberOfRateLimitRetries": 0
}
Then in Program.cs, we'll need to add the options configuration and the Contentful services to the service container
builder.Services.Configure<ContentfulOptions>(builder.Configuration.GetSection("ContentfulOptions"));

builder.Services.AddContentful(builder.Configuration);
Fetch data from Contentful
In the Server project, add a new "API Controller with read/write actions" called TodoController - make sure to add the [Authorize] attribute to the top of the class to ensure that direct calls to the API endpoints are challenged for credentials.
Under the Shared project, create a TodoItem class with properties matching the content model from Contentful. We'll also need to include an additional property called "Sys", of type SystemProperties, which is part of the Contentful library so you'll need to add the "contentful.csharp" NuGet package to the Shared project. This property includes, among various other pieces of data, the entry ID.
Note: The naming of the Sys property is important as it maps directly to the property name in Contentful.
public class TodoItem
{
    public SystemProperties Sys { get; set; } = new();
    public string Task { get; set; } = string.Empty; public bool Completed { get; set; }
}
We will also create a view model to represent the fields used in the client app:
public class TodoItemViewModel
{
    public string Id { get; set; } = string.Empty; public string Task { get; set; } = string.Empty;
    public bool Completed { get; set; }
}
Now, in order to fetch the todo items from Contentful, we first need to inject a Contentful delivery API service client into the constructor:
private readonly IContentfulClient _cdaClient;

public TodoController(IContentfulClient cdaClient)
{
    _cdaClient = cdaClient;
}
and replace the existing Get() method with
[HttpGet]
[AllowAnonymous]
public async Task<IActionResult> Get(CancellationToken cancellationToken = default)
{
var entries = await _cdaClient.GetEntries<TodoItem>(cancellationToken: cancellationToken);
return Ok(entries.Select(i => new TodoItemViewModel
{
Id = i.Sys.Id,
Task = i.Task,
Completed = i.Completed,
}));
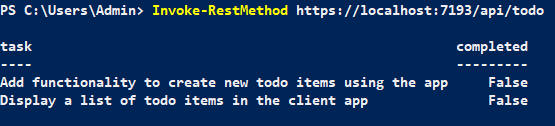
}This will fetch the entries and bind them into a TodoItem list, then convert them into a list of view models to return to the client. Run the application and call the same endpoint to fetch your list of todo items. The [AllowAnonymous] attribute applied to this method allows us to hit the endpoint without credentials, otherwise we'd receive a HTTP 401 Unauthorized response code.
Display the Contentful response on the front-end
This is all great so far, but we want this data to be visible in the WASM front-end, so let's do that next.
In the Client project, under Pages, create a new Razor component called Todo.razor. Give it a @page directive of "/todo", and add another link to the NavMenu component under Shared
<div class="nav-item px-3">
    <NavLink class="nav-link" href="todo">
        <span class="oi oi-list-rich" aria-hidden="true"></span> Todo
    </NavLink>
</div>
Back in the Todo.razor, we want to fire off a request to our Server API and display the results in a simple table.
First, we need to ensure users are authenticated when using this page
@attribute [Authorize]and we also need to inject a service which will allow us to generate HTTP requests
@inject IHttpClientFactory _httpClientFactory;and import the required namespace for our TodoItem
@using BlazorWasmAuth0ContentfulDemo.Shared;In the @code block, add a new field to represent our list of tasks, and override the component's OnInitializedAsync method to call of to the API
private List<TodoItemViewModel> items = new();

protected async override Task OnInitializedAsync()
{
    var httpClient = _httpClientFactory.CreateClient("ServerAPI");
    var response = await httpClient.GetAsync("api/todo");
    if (response.IsSuccessStatusCode)
        {
            var responseContent = await response.Content.ReadFromJsonAsync<List<TodoItemViewModel>>();
            if (responseContent is not null)
                {
                    items = responseContent;
                }
        }
}
In the component's body, we're just going to create a simple table to display the data returned from the API
<table class="table">
<thead>
<tr>
<th scope="col">ID</th>
<th scope="col">Task</th>
<th scope="col">Completed</th>
</tr>
</thead>
<tbody>
@foreach (var item in items)
{
<tr>
<td>@item.Id</td>
<td>@item.Task</td>
<td><input type="checkbox" checked="@item.Completed" /></td>
</tr>
}
</tbody>
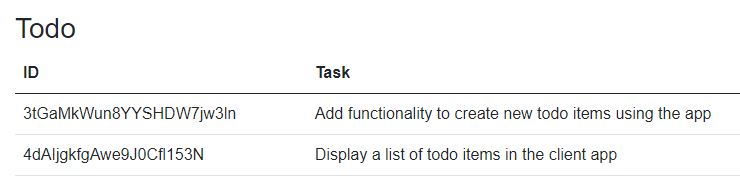
</table>Run the app and you will hopefully see something like this
Add functionality to create, update and delete tasks
Now we've got authentication and Contentful connections working properly, we want to implement the functionality required to create new tasks, mark existing tasks as complete, and delete tasks which aren't needed.
Create
Lets begin by using the Contentful management API to create new entries from our Blazor app.
In the Server project's ItemController, replace the boilerplate Post method with
[HttpPost]
public async Task<IActionResult> Post(
    [FromBody] string task,
    CancellationToken cancellationToken = default)
{
    var newEntryId = Guid.NewGuid().ToString();
    var entry = new Entry<dynamic>
        {
            SystemProperties = new() { Id = newEntryId },
            Fields = new
                {
                    Task = new Dictionary<string, string>()
                        {
                            { "en-US", task }
                        }
                }
        };

    await _cmaClient.CreateOrUpdateEntry(entry, contentTypeId: "todoItem", cancellationToken: cancellationToken);
    await _cmaClient.PublishEntry(newEntryId, 1, cancellationToken: cancellationToken);

    var itemViewModel = new TodoItemViewModel
        {
            Id = newEntryId,
            Task = task
        };

    return Created(newEntryId, itemViewModel);
}
then update the view to include a simple form which calls this method upon submission
<EditForm Model="newTask" OnValidSubmit="CreateItem">
    <InputText @bind-Value="newTask"></InputText>
    <button type="submit">Create Task</button>
</EditForm>
If CreateItem is successful, the new item is added to the model represented in the table, triggering a re-render of the component.
Update
We now want to be able to update tasks to indicate whether they've been completed or not.
As before, we'll start by changing the boilerplate controller method.
[HttpPut]
public async Task<IActionResult> Put(
  [FromBody] TodoItemViewModel item,
  CancellationToken cancellationToken = default)
{
    var existingEntry = await _cmaClient.GetEntry(item.Id, cancellationToken: cancellationToken);
    var existingVersion = existingEntry.SystemProperties.Version.GetValueOrDefault(0);
    var updatedEntry = new Entry<dynamic>
        {
            SystemProperties = new() { Id = item.Id },
            Fields = new
                {
                    Task = new Dictionary<string, string>()
                        {
                            { "en-US", item.Task }
                        },
                        Completed = new Dictionary<string, bool>()
                            {
                                { "en-US", !item.Completed }
                            }
                }
       };

    await _cmaClient.CreateOrUpdateEntry(updatedEntry, version: existingVersion, cancellationToken: cancellationToken);
    await _cmaClient.PublishEntry(item.Id, existingVersion + 1, cancellationToken: cancellationToken);

    return Ok();
}
This looks very similar to Create, with the exception of an additional call to the management API as we need the current entry's version number in order to update it, and then we need to increment this number to publish the new version to avoid conflicts.
In the Client project component, add the following method to handle updates
private async Task UpdateItem(
  TodoItemViewModel item)
{
    var httpClient = _httpClientFactory.CreateClient("ServerAPI");
    var response = await httpClient.PutAsJsonAsync("api/todo", item);

    if (response.IsSuccessStatusCode)
        {
            items.Single(i => i.Id == item.Id).Completed = !item.Completed;
        }
}
and update the checkbox markup to include an "onchange" event handler to trigger the update when the value is changed. Run the application and you should see the values being updated.
@onchange="() => UpdateItem(item)"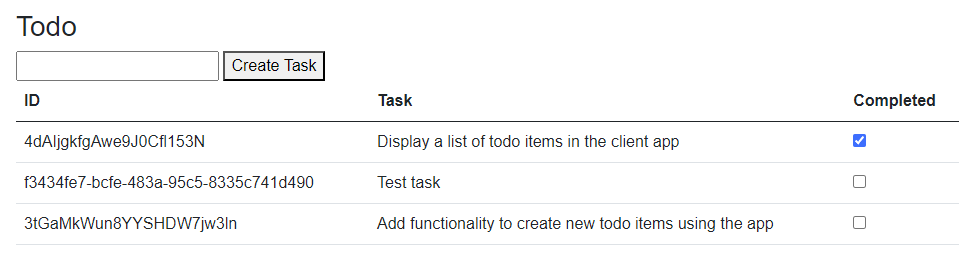
Delete
We have a "Test task" which isn't really relevant, so let's add the functionality to delete it through the app.
[HttpDelete("{id}")]
public async Task<IActionResult> Delete(
  string id,
  CancellationToken cancellationToken = default)
{
    var existingEntry = await _cmaClient.GetEntry(id, cancellationToken: cancellationToken);
    var existingVersion = existingEntry.SystemProperties.Version.GetValueOrDefault(0);

    await _cmaClient.UnpublishEntry(id, existingVersion, cancellationToken: cancellationToken);
    await _cmaClient.DeleteEntry(id, existingVersion, cancellationToken: cancellationToken);

    return Ok();
}
Similar to update, we need the existing entry's version number to ensure we're deleting the latest. The additional step required for Contentful is that the entry needs to be unpublished before it can be deleted.
Last of all, let's add the functionality to the Client component
private async Task DeleteItem(
  TodoItemViewModel item)
{
    var httpClient = _httpClientFactory.CreateClient("ServerAPI");
    var response = await httpClient.DeleteAsync($"api/todo/{item.Id}");

    if (response.IsSuccessStatusCode)
        {
            items.Remove(item);
        }
}
and add a column heading and cell for the delete button
<th scope="col">Delete</th>

<td><button type="button" class="btn btn-danger" @onclick="() => DeleteItem(item)">Delete</button></td>
Run the application and you should now able to delete any unwanted tasks.