Comments & Suggestions
Do you have any comments or suggestions which could improve this guide for others, or are there any parts which need updating, or correcting? If so, please get in touch by emailing me at contact@tomjones.dev.
Introduction
If you find yourself with code which is shared between various solutions, rather than duplicate it, you can create a shared package which can then be referenced wherever it's needed.
Assumptions
- You have a Github account with full privileges
Steps
Generate a Github access token
- Log into the Github account which will be hosting the new package repository and navigate to Settings Developer Settings Personal access tokens, then click , selecting the "classic" option:
| Property | Value |
|---|---|
| Note | Provide a meaningful name for the token, e.g. "NuGet Publish" |
| Expiration | This depends how frequently you think you'll be publishing changes to packages using these credentials - choose a short expiration for better security |
| Select scopes |
Check "write:packages" |
Then click and make a note of the value provided (this is the only time it will be visible).
Add the package source to your local NuGet configuration
Locate your local NuGet.Config file - on Windows this may be found under C:/Users/[username]/AppData/Roaming/NuGet/NuGet.Config and add a new package source key/value pair, with a meaningful key name (e.g. "GithubPackages"), this is the value which will appear in the package manager UI drop down list for package sources. The config file also needs an entry under "packageSourceCredentials", consisting of your Github account username, and the PAC token you just generated, e.g.
<add key="[Source name]" value="https://nuget.pkg.github.com/[repository name]/index.json" />
<packageSourceCredentials>
  <GithubPackages>
    <add key="Username" value="[Github username]" />
    <add key="ClearTextPassword" value="[personal access token]" />
  </GithubPackages>
</packageSourceCredentials>
Create a class library project
Create a new .NET standard class library project using the Visual Studio template selection, ensuring the framework selected matches the frameworks which will be consuming the package. Choosing ".NET Standard 2.1" will ensure a greater variety of support than specific versions.
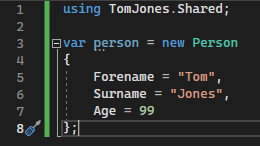
Rename the default Class1 file and define a simple class which will be shared between projects, e.g.
public class Person
{
    public string Forename { get; set; }
    public string Surname { get; set; }
    public int Age { get; set; }
}
Build and publish the package to Github
Add the new project to git source control and push to the remote repository, making a note of the new repository URL (https://github.com/[owner]/[repository name]).
Right click project > Properties > expand the Package section and set the following values:
| Property | Value |
|---|---|
| Produce a package file during build operations | Checked |
| Author | Your full name |
| Description |
A brief explanation of your package, e.g. "A collection of classes for use across projects." |
| Repository URL |
The URL of your new repository from above |
| Build > Output > Generate a file containing API documentation |
Checked if you use summary blocks to document your code and want these visible to consumers of the package |
| Version |
Default, but increment the version number manually if you're updating from a previous version |
Commit your changes to the repository, then using a terminal of your choice, enter
dotnet pack --configuration Releaseto create a .nupkg file in the project's ~/bin/Release directory, then
dotnet nuget push "<path to .nupkg file>" --source "<source name from nuget.config>"to push the new package to your Github Packages repository.
Example path: [project root]/bin/Release/[package-name].1.0.0.nupkg
Example source: "GithubPackages"
You may see some warnings about a missing API key because we didn't use that authentication method, but the final output should be "Your package was pushed", which can be confirmed by going to the "Packages" section on your Github account.

Reference the package in your application
Open up the project which will be consuming your package, ensuring the target framework is supported back the one your package was created for and right click and "Manage NuGet Packages"
Select your new configuration from the "Package source" drop down menu and you should see your new package shown under "Browse", which you can download and begin referencing the class in your code.

If colleagues or other users need to make use of the resources in the package, and assuming they have a Github account with access to the package repository, they can generate a personal access token using the same method as described above. Consumers should only have the "read:packages" scope, and not full write privileges.