Introduction
In this article, we'll use the AWS CDK to create and deploy a service to handle notifications, with data built up from values submitted by a contact form on a simple .NET website. We'll also make use of the APIs available on the AWS SDK to communicate with our cloud resources.
Assumptions
- An AWS account with sufficient privileges to create resources
- The AWS CLI is already installed and configured with your credentials
- Familiarity with .NET web APIs beneficial but not required
- Familiarity with AWS SNS beneficial but not required
Steps
What is the AWS CDK
The AWS Cloud Development Kit (CDK) is a collection of APIs distributed as individual packages which allow developers to define resources in a programming language they're familiar with.
For example, for a .NET developer to define the infrastructure to create a new SNS topic, all that is needed is the following line of code which creates a Topic using a familiar pattern for object instantiation:
var topic = new Topic(this, "MyTopic");The topic object then includes all the object properties and methods available to manage storage.
This method of building and deploying cloud infrastructure allows developers to:
- reduce the learning curve needed to deploy AWS resources as users don't need to learn how to write templates using services such as CloudFormation or Terraform
- speed up the development of cloud solutions as developers don't need to navigate around the AWS console, or memorise hundreds of CLI commands
- easily create and share cloud resources across their team
- easily bring cloud resource architecture into source control
- automate infrastructure deployments as part of their application build pipelines.
The currently supported languages are:
- C#
- TypeScript/JavaScript
- Python
- Java
- Go
Install the CDK
This article assumes that you already have an AWS account, and that you have the AWS CLI installed and configured with your credentials - if you don't, start by following the steps detailed in the AWS documentation. You'll also need to download and install Node with NPM.
Once you have those bits set up and configured, you can then install the CDK globally from a terminal using NPM:
npm install -g aws-cdkInitialise the CDK in your project
Once installed, navigate to your local repository directory and create a folder called "AWS", then open up a PowerShell terminal in the new directory.
cd <your source code directory>
mkdir AWS
cd AWS
You can initialise a new CDK project using the following command:
cdk init app --language csharpThis command generates a few starter files in your AWS folder. In the src directory of the generated files, you'll find a solution file called Aws.sln, open this up in Visual Studio.
Project structure
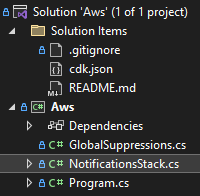
The main parts of your logic will be contained within the src directory, but the command also generates a few other files which you may find useful to include in your solution tree. Right click the solution to add a solution folder, then add the .gitignore, cdk.json and README.md files to this folder.
The only other files worth mentioning are the Program.cs and the AwsStack.cs files. The former is where you can define the collection of CloudFormation stacks needed for your cloud solution, along with any additional configuration required for your AWS account, and the latter is where you will define the resources needed for the stack we will shortly be creating. The stack we'll be creating will only be for handling notifications with SNS, so we'll rename this file and any associated references to NotificationStack.
Bootstrap CDK with your AWS account
Before you're able to create any resources in AWS using the CDK, you first need to "bootstrap" your account to prepare it for deployments. This process creates a CloudFormation stack called "CDKToolkit", and generates resources using the following services:
- Systems Manager (parameter)
- IAM (roles, policies)
- ECR (repository)
- S3 (bucket, bucket policy)
Bootstrapping is performed using the following command:
cdk bootstrapNote: You may incur charges for resources created by bootstrapping. You can easily remove the resources created during this tutorial with cdk destroy. To remove the bootstrap resources, you will need to manually delete the "CDKToolkit" stack - this can be done via the console, or the CLI with aws cloudformation delete-stack --stack-name CDKToolkit.
Create your resources
As touched on in the introduction to this article, we'll be creating the resources needed to allow our app to send an email using Simple Notification Service (SNS). The example used here is a website contact form, which is submitted using JavaScript's fetch API to a .NET web API endpoint.
In order to reference the resource classes and methods available with the AWS CDK, you'll need to bring the applicable NuGet packages into your project. This article will only make use of SNS, so add the Amazon.CDK.AWS.SNS package, which includes the core CDK library, among a few others services.

Constructs
The resource classes (constructs) built into the CDK packages come in three distinct flavours, which determine the level of detail needed to define them; Level 1, 2 and 3 (L1/L2/L3).
- L1: Prefixed with
Cfn, these classes represent objects which require the highest level of configuration. No default values are set, and the objects don't include any handy helper methods. Recommended only if you need very fine-grained control of the resource being created (example:CfnTopic) - L2: Named after the AWS resource without any prefixes, these classes are the ones more commonly used as they come configured with sensible (opinionated) default values, and include various contextual helper methods, such as
AddSubscription(example:Topic) - L3: Named after their overall function, these classes are used to create the resources necessary to satisfy a particular use case (example:
ApplicationLoadBalancedEc2Service). Further details regarding the available patterns can be found in the CDK documentation.
Create a Topic and Subscription
This stack will only make use of a single service, SNS, which we can define with two simple object instantiations - a topic and a subscription to that topic - and we'll use the L2 versions of these constructs to keep things simple.
using Amazon.CDK;
using Amazon.CDK.AWS.SNS;
using Construct = Constructs.Construct;

namespace Notifications
{
    public class NotificationsStack : Stack
    {
        internal NotificationsStack(Construct scope, string id, IStackProps props) : base(scope, id, props)
        {
            var topic = new Topic(this, "ContactFormSubmission", new TopicProps
            {
                TopicName = "ContactFormSubmission"
            });

            var subscription = new Subscription(this, "Subscription", new SubscriptionProps
            {
                Topic = topic,
                Region = "eu-west-2",
                Protocol = SubscriptionProtocol.EMAIL,
                Endpoint = "contact@tomjones.dev"
            });
        }
    }
}
The NotificationStack signature is unchanged from the CDK initialisation, and in this case we've added a Topic called "ContactFormSubmission", with a single Subscription specifying that the subscriber (me) will be notified by email. In a real-life scenario, you're more likely to add subscribers manually or programmatically after deployment rather than them being hardcoded into the stack like this.
Note: the EMAIL protocol doesn't support the first in first out (FiFo) topic type, and will fail to build during deployment, however this value defaults to false and therefore doesn't need to be declared in the Topic definition for in this scenario.
Deploy your resources
Deploying a CDK project generates a CloudFormation template, which is then uploaded to AWS and processed like any other CloudFormation stack. If you're familiar with CloudFormation templates, you may wish to confirm the output of the objects you've defined in code prior to deployment - this can be done by running the synthesise command:
cdk synthWhich outputs a template similar to below for my example:
Resources:
  ContactFormSubmissionEA03D76B:
    Type: AWS::SNS::Topic
    Properties:
      TopicName: ContactFormSubmission
    Metadata:
      aws:cdk:path: NotificationsStack/ContactFormSubmission/Resource
  Subscription391C9821:
    Type: AWS::SNS::Subscription
    Properties:
      Endpoint: contact@tomjones.dev
      Protocol: email
      Region: eu-west-2
      TopicArn:
        Ref: ContactFormSubmissionEA03D76B
    Metadata:
      aws:cdk:path: NotificationsStack/Subscription/Resource
  CDKMetadata:
    Type: AWS::CDK::Metadata
    Properties:
      Analytics: v2:deflate64:H4sIAAAAAAAA/02JsQ6CMBRFv4WdPihENweDrgxAXE0pNXmifU1fKwPx303TxdzhnntuA7JtoS7UxkIvq3jhDPsYlF5LtfGdLcM+kUNddg+bYYwza48uINlk//c3icEwRa9N4o7sgvm5UOhNqI5QQ3OooL9OHXlzdk7cjGcke/q0ICsJdUrxZEThow34NjDk/gF9G3b6rgAAAA==
    Metadata:
      aws:cdk:path: NotificationsStack/CDKMetadata/Default
    Condition: CDKMetadataAvailable
Conditions:
# ...Removed for brevity
Once you've checked through the generated CloudFormation resource structures and you're ready to deploy, run the following command to push your infrastructure into AWS:
cdk deployIf you hardcoded a subscription email as I've done in this example, you'll see an email pop into your mailbox during deployment to confirm your subscription to the new topic. This will need to be confirmed before you're able to receive notifications.
For further details on the properties and methods available as part of the CDK package for SNS, have a look through the SNS reference documentation.
Implement your deployed resources using the AWS SDK
In this section, we'll implement our deployed SNS topic into a simple .NET application which takes a few user details and generates a notification to be sent to the subscribed email address.
Add the AWS SDK for SNS to your project by installing the AWSSDK.SimpleNotificationService NuGet package.

Add a controller endpoint which implements the SDK, this is an example method in a HomeController class:
[HttpPost]
public async Task<IActionResult> SubmitFeedback(
    [FromForm] Feedback feedback,
    CancellationToken cancellationToken = default)
{
    var key = "your-aws-key";
    var secret = "your-aws-secret-key";
    var region = RegionEndpoint.EUWest2;

    var message = new StringBuilder();
    message.Append($"Name: {feedback.Name}\n");
    message.Append($"Email: {feedback.Email}\n");
    message.Append($"Message: {feedback.Message}\n");

    var client = new AmazonSimpleNotificationServiceClient(key, secret, region);
    var request = new PublishRequest("arn:aws:sns:eu-west-2:xxxxxxxxxxxx:ContactFormSubmission", message.ToString(), "Contact Form Submission");

    var response = await client.PublishAsync(request, cancellationToken);

    return response.HttpStatusCode == HttpStatusCode.OK
        ? Ok()
        : BadRequest();
}

public class Feedback
{
    public string Name { get; set; } = string.Empty;

    public string Email { get; set; } = string.Empty;

    public string Message { get; set; } = string.Empty;
}
You can then run your project and call your endpoint using an API tool like Postman.
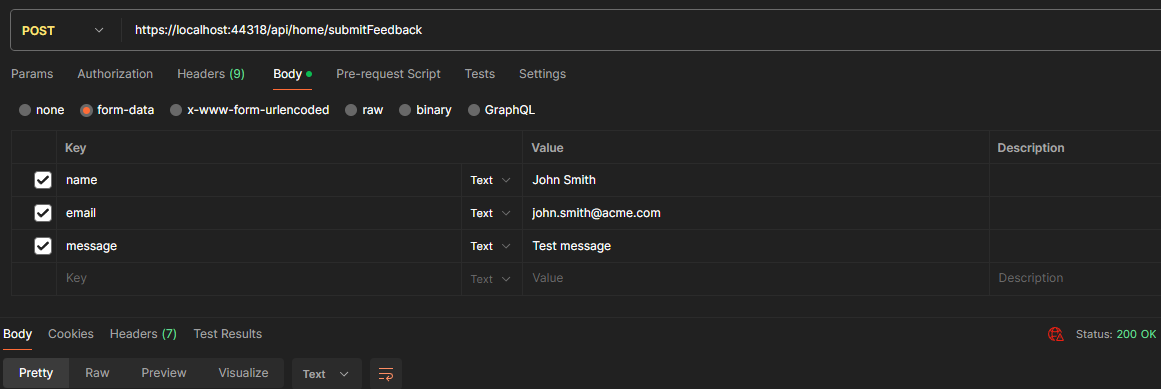
And that's everything needed to test the integration of your new CDK deployed resources, however you may want to read on for a better method of communicating securely with AWS resources, and also if you want to add a simple UI to your API endpoint.
Managing credentials
The endpoint above hardcodes AWS credentials, but a better practise is to make use of IConfiguration and appsettings.json, or another AWS service called Secrets Manager. You can read up on the various options available to manage secure credential storage in my article Manage app credentials with AWS Secrets Manager.
Alternatively, if you're deploying your application to EC2, you can attach a role to your instance and create a policy which grants access to the Publish command of your topic, an example policy is shown below:
{
    "Version": "2012-10-17",
    "Statement": [
        {
            "Sid": "VisualEditor0",
            "Effect": "Allow",
            "Action": "sns:Publish",
            "Resource": "arn:aws:sns:eu-west-2:xxxxxxxxxxxxx:ContactFormSubmission"
        }
    ]
}
You can then remove the key, secret and region variables from the endpoint and make use of the parameterless AmazonSimpleNotificationServiceClient constructor.
Implement a UI for our endpoint
As my use case is for a contact form on a website, I'll add a simple form element to represent the request body:
<form method="post">
<label>Name</label>
<input type="text" name="name">
<label>Email</label>
<input type="email" name="email">
<label>Message</label>
<textarea name="message"></textarea>
<button>Submit</button>
</form>My contact form is in a popup, so I'll include a bit of JavaScript to form a REST request to the endpoint to avoid a full page refresh when the form is submitted:
document.addEventListener("DOMContentLoaded", () => {
  addFeedbackEventListeners();
});

function addFeedbackEventListeners(event) {
  document.querySelector('form button').addEventListener('click', submitFeedback);
}

async function submitFeedback(event) {
  event.preventDefault();

  const form = document.querySelector('form');
  const formData = new FormData(form)

  const response = await fetch('api/home/submitFeedback', {
    method: 'POST',
    body: formData,
  });
}