Introduction
Following on from the previous article which tackles setting up and configuring a LAMP stack WordPress instance, we will now look at registering a domain and securing the website with a free SSL certificate provided by Let's Encrypt. The HTTPS protocol uses TLS/SSL encryption to secure communications between users and servers, and prevent "man in the middle" style attacks. TLS/SSL encryption is a necessity if your website transmits personal or financial information across a network. The example used in this article is for a WordPress website hosted on Ubuntu, however the domain and certificate configurations covered throughout should apply to other types of website hosted on a variety of Linux distributions.
Assumptions
- Your website is hosted using a service provider which is separate to your domain
Domain Registration
There are many domain name sellers (registrars) to choose from; the most popular ones at the moment seem to be Namecheap and GoDaddy, but large, multi-service providers such as Google and AWS also offer these services. You will find that many sellers are actually hosting providers with domain name registration included. Whatever your needs, there's plenty of choice, and the process of registering a domain name will be similar across most services.
A few tips for naming which I tend to follow:
- short - if your brand name is long, would an acronym work better?
- descriptive - is it a brand name, or do you provide a service?
- easy to spell, type, and say out loud - using a name with an English word spelled wrongly can be quite difficult if you're talking about it with potential clients etc. (e.g. "go to www.goooogle.com, but with 4 "O"s, or "visit www.majestik.com" spelled with a "K" at the end", the same applies to domains with hyphens
- avoid "trendy" TLDs - the current hype is all about AI, so .ai domains are priced higher. The previous hype was for .io domains preferred by tech and SaaS providers. You'll find these trendy domains can command prices up to 5-10 times more expensive than the typical .com/.net ones
- ignore the "initial" price - registrars always offer cheap domains for the first year. Don't get roped in to a domain which can be bought for £10 now, but costs £50 each year to renew unless you're happy with that recurring cost.
Purchase a domain through a hosting provider/registrar
I will use Namecheap in this example as that is where this domain is registered. It was cheapest option when I first purchased my domain, and this website's hosting provider (AWS), for some inexplicable reason doesn't support the ".dev" top level domain (TLDs). Beyond this reasoning, I have no affiliation with Namecheap, but I've found domain management to be simple, and the UI is pretty good, so I have no reason to move.
Begin by heading to https://www.namecheap.com/ and you're immediately shown a domain name search box, enter your desired domain name and hit , scroll down the list until you find a suitable option and .
Domain registrars typically offer SSL certificates as an add-on for your domain, but these come at a cost. For a personal domain, the only add-on I'd opt for is the WHOIS protection, which hides the personal data you have to supply during registration from the public internet (home address, email etc.).
Purchase a domain through AWS Route53
Navigate to Route53, and on the dashboard you'll see a section to search for domain name availability.
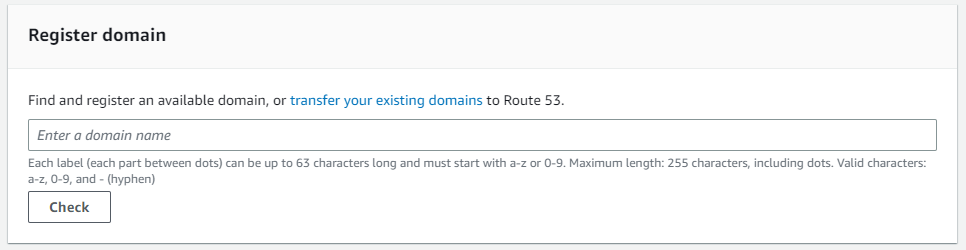
Pick a name and hit . Similar to other registrars, you'll be shown pricing for various TLDs, and alternatives if your chosen one is unavailable. Pick a suitable option and hit , proceed through the checkout and you'll end up on the new domain's hosted zone records page, which has been created for you automatically.
Add nameservers to domain registrar
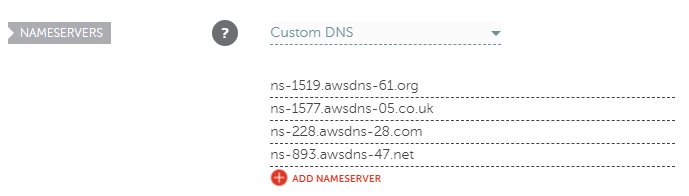
If you're managing a hosted zone in AWS, but your domain is registered with a third party registrar such as Namecheap, you will need to change the 4 nameserver records listed in the registrar domain configuration to those shown in your Route53 records. Go to Route53, and find the "NS" record which is created automatically during registration.

Copy these 4 values, and navigate to your new domain's management/configuration page - on Namecheap, this is found on the domain list by pressing , then under the Domain tab, scroll down to "Nameservers", select "Custom DNS" from the drop down list, then paste each value from Route53 on its own line (excluding the "." at the end).
Configure address records for your domain
Once your domain is registered, and any nameserver configuration is complete, your next step is to point your new domain at the instance where it is being hosted. You will only need to add two records here, one to cover the domain name by itself, and another to target the typical "www" subdomain.
| Domain | Record Type | Value |
|---|---|---|
| A | Your instance's pubic IP address | |
| www | A | Your instance's pubic IP address |
Install an SSL certificate using certbot
certbot is Let's Encrypt's certificate service and can be installed directly on the server to manage certificate creation and automatic renewal.
Configure an AWS IAM role for certbot
AWS Identity and Access Management (IAM) is an AWS service which allows you to create users and roles with explicit permissions to your AWS resources. We will be creating a user for Let's Encrypt's certbot to allow the service to perform DNS verification. Although this method requires a little more initial setup than other methods, it makes renewals much simpler.
Log into the AWS Console and select IAM from the list of services. From the sidebar, under Access management, select Policies, then hit Create Policy, select the JSON tab and replace the default contents with the below:
{
  "Version": "2012-10-17",
  "Statement": [
    {
	"Effect": "Allow",
	"Action": [
          "route53:GetChange",
          "route53:ListHostedZones",
          "route53:ChangeResourceRecordSets"
	],
	"Resource": "*"
    }
  ]
}
Press "Review Policy", enter a meaningful name (e.g. "dns-verification") and a brief description if desired and press "Create Policy".
From the sidebar, under "Access management", select "Users", then "Add User". Enter a meaningful username (e.g. "certbot"), select "Programmatic access" for the Access Type, then press Next to proceed to permission selection.
Select the "Attach existing policies directly" option, enter the name of your new policy in the search filter, select it and skip to the end to review your settings, then press "Create User". When this is complete, be sure to make a note of the Access key ID and Secret Access Key.
Install certbot and verify your domain
Open up a browser and follow the instructions described at https://certbot.eff.org/instructions. If you're following on from the LAMP stack article, select "Apache" and "Ubuntu 20" from the software and "System" drop-down lists respectively, then select the "wildcard" tab. Complete these steps until you reach step 8 "Install correct DNS plugin".
If your DNS records are on AWS Route53, you will need to install the "certbot-dns-route53" plugin, and the credentials step which follows will require the AWS CLI
sudo apt install certbot-dns-route53 awscliYou will then need to configure the AWS IAM credentials for the "certbot" user you created earlier
aws configureWhen prompted by the CLI, enter the key ID, secret key, your instance's region (e.g. eu-west-2), and leave the format section blank to default to JSON.
Once these steps are complete, you can use certbot to generate certificates using DNS verification, which prompts you to add temporary TXT records to your DNS
certbot certonly --dns-route53 --dns-route53-propagation-seconds 30 -d example-website.com -d *.example-website.com -i apache

# In some cases, you may need to specify the config, log and word directories by including the following parameters

certbot certonly --dns-route53 -d example-website.com -d *.example-website.com -i apache --config-dir ~/.certbot/config --logs-dir ~/.certbot/logs --work-dir ~/.certbot/work
Once created and verified, note down certificate and certificate key paths.
Update the website configuration file
Open the configuration file for your WordPress website in a text editor. We initially only added a virtual host for HTTP port 80, we now also need to include an additional port forwarding section to cover SSL port 443:
<VirtualHost *:443>
  ServerName example-website.com
  ServerAlias example-website.com *.example-website.com
  ServerAdmin you@example-website.com
  DocumentRoot /var/www/example-website

  SSLEngine on
  SSLCertificateFile /etc/apache2/ssl/example-website/apache.crt
  SSLCertificateKeyFile /etc/apache2/ssl/example-website/apache.key

  RewriteEngine on
  RewriteOptions inherit

  RewriteRule \.(svn|git)(/)?$ - [F]

  RewriteCond %{HTTP_HOST} !^www.example-website\.com [NC]
  RewriteCond %{HTTP_HOST} !^$
  RewriteRule ^/(.*) https://www.example-website.com/$1 [L,R]
</VirtualHost>

# Save and exit
CTRL + O, ENTER, CTRL + X

# Enable the SSL module
sudo a2enmod ssl

# Test config
sudo apachectl configtest

# Reload Apache to activate new configuration
sudo systemctl reload apache2
Update firewall settings
Navigate to your hosting provider's firewall settings, in AWS this is your instance's security group, and similar to the "HTTP" rule you should already have for port 80, you will need to add a similar rule for "SSL" (port 443).
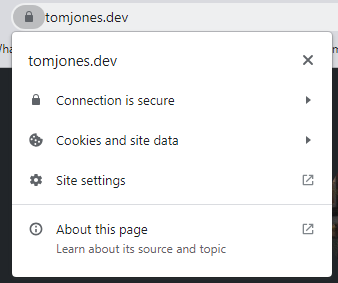
Once all these steps are complete, you should be able to navigate to your domain, and see a lock and certificate details symbol displayed beside the browser's address bar.