Introduction
In this article, we'll introduce a few of the main concepts for testing APIs using Postman. We'll cover how to manage a collection of API requests, store variables for use across various requests, manage different environments to allow us to easily switch between testing local or production endpoints, handle authentication, create requests, and test responses using some simple JavaScript. This will be a fairly short guide, aimed at just covering a few high-level topics to get you started with API testing.
Assumptions
- Basic understanding of the HTTP request/response process
- Familiarity writing or consuming REST API endpoints beneficial but not required
- Familiarity with JavaScript and JSON beneficial but not required
Table of Contents
Download and install Postman
You can download and install Postman here, alternatively you can create a Postman account if you prefer to use a web app. Registering an account allows you to take your collections with you wherever you are, so I'd recommend doing so regardless of whether you opt for the desktop or web-based version. This tutorial assumes you'll be using the desktop application.
Create a collection for your API
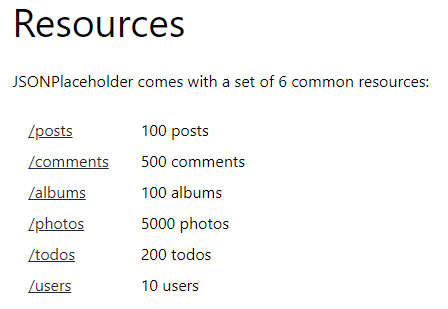
We'll make use of a free API which can found at https://jsonplaceholder.typicode.com for our testing, but you can of course follow along with your own API endpoints.
Open the desktop app, ensure Collections is selected from the left menu and hit the to create a new collection.
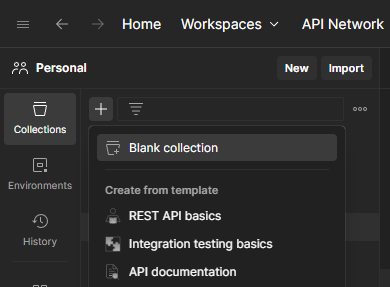
Give it a meaningful name to identify the API you'll be testing. In my case this will be "JSON Placeholder".
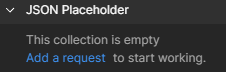
Create a GET request
You should see your collection in the sidebar. Click "Add a request" to get started.
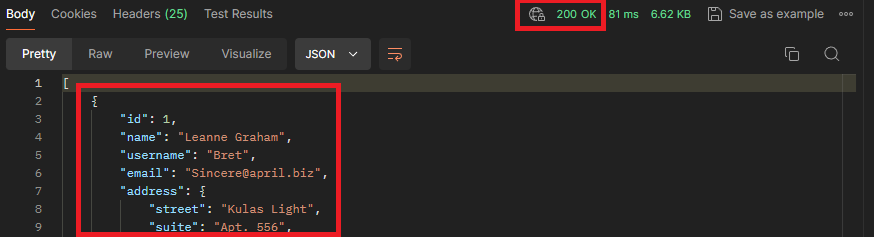
JSON Placeholder provides endpoints for a few resources. We'll start by fetching users from the /users endpoint. On your new request, give it a name which identifies the endpoint, or purpose of the request, such as "Get Users", select GET from the request method dropdown (usually selected by default), and paste the endpoint URL https://jsonplaceholder.typicode.com/users in the address bar, then hit "Send".

There aren't any complexities such as authentication required for this endpoint, so assuming the URL is correct, you should see the response body almost immediately, along with a 200 OK status code to indicate success.
Create a GET request using parameters
Next we'll retrieve a single result by adding a parameter to the request. The example API defines an endpoint which returns comments matching a specific postId. Create another GET request by right clicking the previous one and clicking "Duplicate", or using the shortcut CTRL + D, and give it a name like "Get Comments By Post ID" and change the resource from users to comments.
Query parameters can be added either in the address bar using sequences of URL-encoded key-value pairs, or more easily from the "Params" tab of the request settings. Add a parameter with the Key of postId and the Value of 1 - you'll notice that the address bar is automatically populated with the parameter.

Hit and you should see a number of comments matching the postId in the response.
Create a POST request
Create another request, but this time change the method verb to POST, and the resource to posts. Hit and you should receive a (mock) 201 Created with an id for the newly created post.
{
  "id": 101
}
This being a fake endpoint, you're not actually creating real data. This example does however return an object based on the provided values. Typically you'd include data which defines the new object, and we can do that in the request's body.
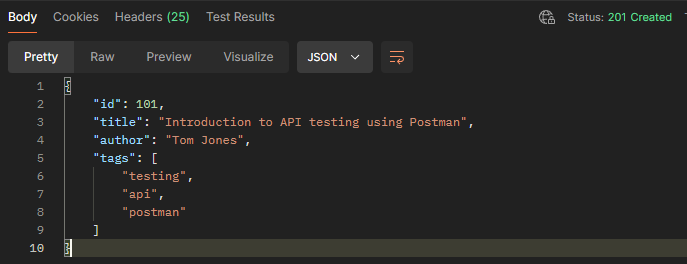
Select the "Body" tab, choose the "raw" options, select "JSON" from the dropdown list, then add a few properties to define your post.
{
"id": 101,
"title": "Introduction to API testing using Postman",
"author": "Tom Jones",
"tags": [
"testing", "api", "postman"
]
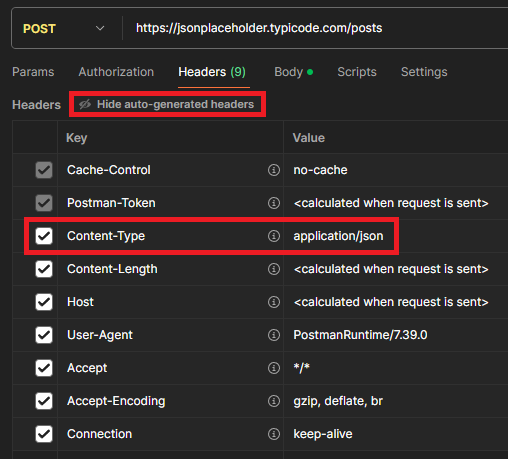
}Choosing "JSON" auto-populates the Content-Type header which you'd usually need to manually define in your requests if the type isn't inferred. Here you can see in the "Headers" tab that the type has been populated for you (you may need to click "x hidden" to show them):
Hit again and you'll see your object defined in the response.
Defining variables
Variables allow you store common values to help simplify your request configuration, reduce duplication, and avoid common issues caused by typing errors. We're using the same base URL for all of the requests in this collection, so let's create a variable for it.
Click on your collection, select the "Variables" tab, and create a new variable called baseUrl.
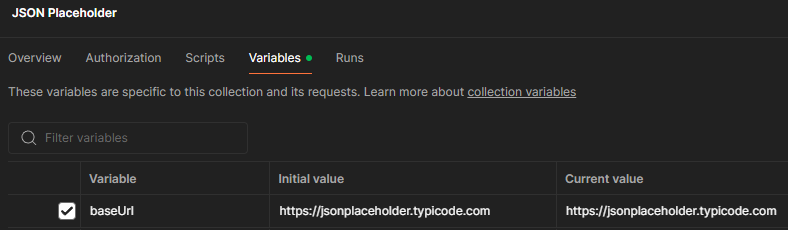
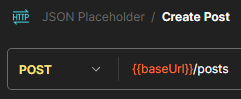
In each of your requests, you can now replace this part of the URL with the variable, using the double brace syntax {{baseUrl}}.
Creating environments
If you're working with a multi-environment application, variables become even more useful when they're defined in separate collection environments. A developer may be targeting localhost during development, then a test engineer may test the same endpoints once they're deployed to a test server, and again once in production. In either case, the baseUrl would need to change based on the target environment.
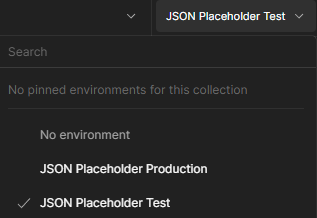
Select "Environments" from the side menu, hit the and give it a name. We'll create two environments to illustrate, "JSON Placeholder Test" and "JSON Placeholder Production". Add a baseUrl variable to each environment in the same way described above. For Test just make up the URL, e.g. "https://jsonplaceholder-test.typicode.com/", and for Production use the proper URL. You may need to disable or delete the collection-level variable created earlier to avoid conflicts.
Go back to your POST request, select the Test environment from the dropdown on the right, and hit .
This will fail because there is no test version of this API, or at least not a public one which matches this URL. Switch to the Production environment, hit and you should get a successful response.
Configuring authentication
More often than not your API will contain numerous endpoints which require authentication. Hitting these without valid credentials will result in a 401 Unauthorized response, or 403 Forbidden if you're authenticated as a user with insufficient privileges.
Authentication can be handled in a few ways depending on the method employed by the API, and it can be configured at request-level, or collection-level depending on your use case. A couple of common scenarios are included below, but there are many more options available.
Note: be careful not to accidentally expose real credentials if you intend to share your collections and environments with colleagues. See the "Security considerations" section for further details.
Request-level authentication with a username and password
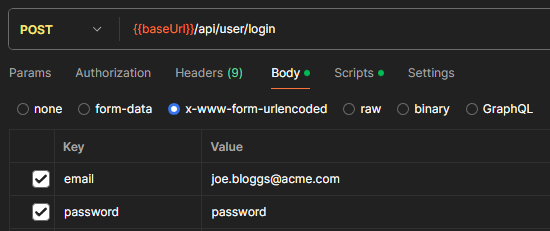
If your API endpoint accepts a raw username/password combination to authenticate and you want to save a request for each role type, you can simply create a request to the application's login endpoint with those credentials in the POST body.
If authentication is handled via the Authorization header, you can instead select the "Authorization" tab, pick "Basic Auth", then enter your username and password in the fields provided.

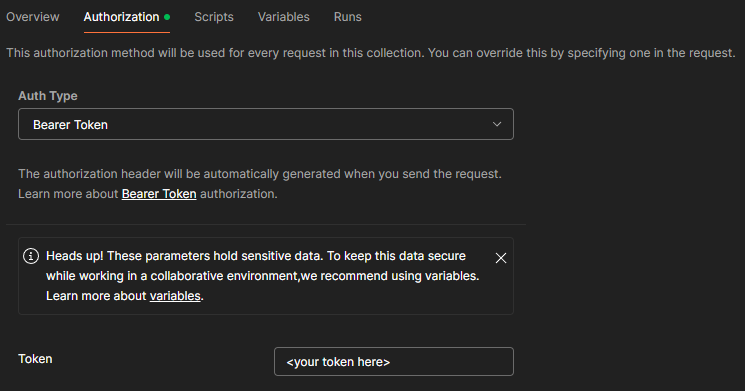
Collection-level authentication with a Bearer token
If you want to use the same authentication method across all requests, then you can set your credentials on the collection instead. On your collection, select the "Authorization" tab, select "Bearer Token" and paste your token in the field.
You can now send requests to protected endpoints using the configured credentials.
Automating endpoint testing with JavaScript
Each request allows you to define scripts to run before and after a request is dispatched. For simple testing purposes, we'll just assert that a few responses contain the expected status codes and body content.
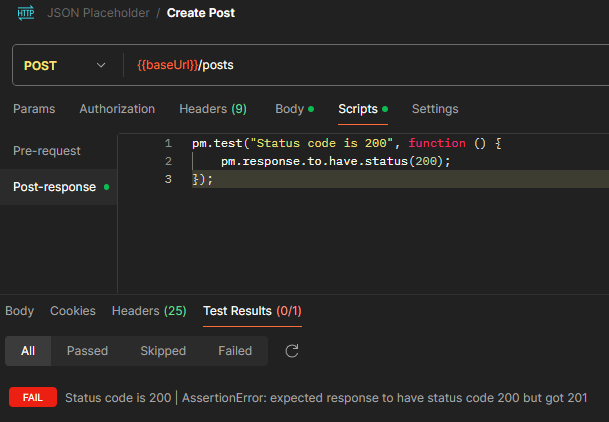
Open the POST request from earlier, navigate to the Scripts tab, and select "Post-response". This section allows you to write JavaScript to read data from the response. Down the right side of the screen is a list of snippets for common test cases - scroll down this list and select "Status code: Code is 200" to add the snippet to the editor panel.
pm.test("Status code is 200", function () {
pm.response.to.have.status(200);
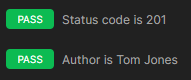
});The test function accepts two arguments; the test name, and a function to execute. Hit Send to execute the request, and you'll notice that this test fails because our POST request returns a 201 Created HTTP status, rather than a 200.
In our case, we need to adjust this slightly as the POST request responds with a if successful, so update the test name and status code check to say 201 and execute the request again.

We can also check that the response body matches expected values. Add the snippet labelled "Response body: JSON value check" to your editor panel and update the test name, along with the value and 100 values to match an expected object property, such as the author:
pm.test("Author is Tom Jones", function () {
  var jsonData = pm.response.json();
  pm.expect(jsonData.author).to.eql('Tom Jones');
});
Importing and exporting collections and environments
If you work as part of a larger team, it's often beneficial to share configurations to ensure everyone is using the same resources. Thankfully Postman allows users to easily export collections and environments as shareable JSON formatted configuration files. These files include all request URLs, variables, parameters, body text, credentials and test scripts, and it's as easy as right clicking the applicable collection/environment, and clicking from the context menu.
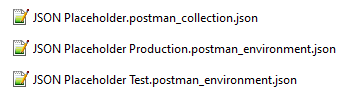
Importing the files is equally simply by clicking the Import button at the top of the left sidebar - you can select all three files at once and Postman recognises the type and imports them into your workspace.
Security considerations
For the security-conscious among you, whether that be simply due to an interest in following good practices, adhering to workplace protocols, or for regulatory compliance, there are two key factors to keep in mind when working with Postman:
- shared credentials
- cloud synchronisation
Shared credentials
HTTP requests which target restricted endpoints contain sensitive authentication details, such as usernames, passwords, and API keys. If you work as part of a larger team and create a collection or environment which you intend to share, your credentials will be visible in plain text to whoever has a copy.
The security risks can be mitigated in a few ways, depending on the level of security you need and your use case:
- moving request-level credentials into an environment variable allows you to choose the variable type, either "default" or "secret". The former is plain text, and the latter masks the value. This is useful if you want people to be able to use the credentials, but not know what they are. In the grand scheme of things, this is not particularly useful as a security measure, but helps prevent people who should not be privy to the credentials seeing the password over the shoulder of someone who is.
- simply maintaining a policy of not sharing environments is one of the simplest options. Although a more helpful option would be to create an environment template. This template includes all of the variables and values needed, but excludes those which should remain secret - each user then just needs to add their own credentials when they first import the environment. This ensures individual credentials aren't accidentally leaked, and helps eliminate credential sharing
- moving all credentials to Postman Vault, available on the desktop app through the button on the bottom of the window (or using the shortcut CTRL, SHIFT + V), allows you to store credentials as variables, but which are secured locally with a key. These variables can then be referenced in a similar manner to other variables, using the
{{vault:secret-name}}syntax. This option has the additional benefit of remaining local to your machine, which will be covered in more detail in the "Cloud synchronisation" section.

Cloud synchronisation
If you're using the full Postman desktop application, your data, including request details, collections and environments, will be synchronised to Postman's cloud services, which are provided by AWS. As mentioned at the start of this guide, this convenience allows you to take your work with you wherever you're signed in, regardless of what machine you're using.
This feature is great if you don't always work from the same machine, but some workplace or industry compliance policies may come into force if your data contains personal credentials or other sensitive data. This is due to the data no longer being isolated to your own machine or private network, but stored on an external cloud service, which is maintained by a third party.
Postman offers two solutions for keeping certain details "off-cloud":
- the lightweight version of the Postman client contains limited functionality, only the ability to build and send requests, but none of the details stored in these requests are synchronised to their cloud services
- the Postman Vault works in a similar fashion to environment variables, referenced using the
{{vault:secret-name}}syntax, the difference being that the entire vault is encrypted, and the data remains on your machine, minimising the risk of a third party data leak impacting you or your employer.
