Introduction
Umbraco's RTE (Rich Text Editor), which uses the TinyMCE editor, is a feature-rich WYSIWYG (what you see is what you get) editor which provides content editors with a wide variety of options when constructing their content. Many of the usual features, such as bold, underline and justify are present out of the box, however a lot of very useful custom features require some extra configuration to get working. This article will guide you through the steps needed to configure appropriate data types to allow and/or restrict features, and implement the less standard ones provided by TinyMCE.
Assumptions
- Visual Studio 2022
- Basic familiarity with the Umbraco back office (e.g. create types, edit content)
- Familiarity with JSON and client-side Javascript libraries beneficial but not required
Steps
Configure the editor properties
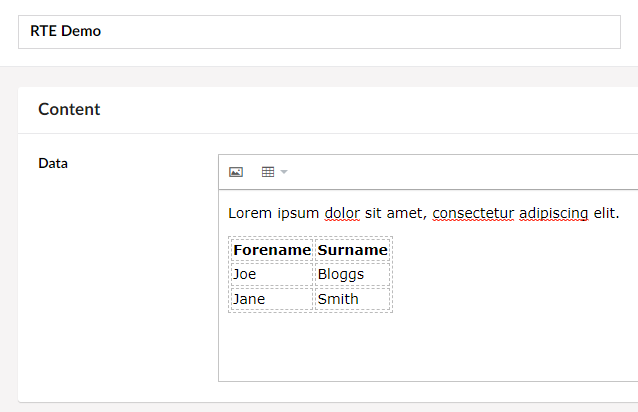
Out of the box, Umbraco includes a data type named "Richtext editor" with some default options selected to allow editors to format their content with common WYSIWYG options such as bold, italic and underline, as well as more complex features such as adding images and tables.
We're going to configure two data types; a simple one for displaying text and data, followed by a more complex version for writing blog articles. Separating out the data types allows us to condense the UI by removing unnecessary toolbar options, and this also has the added benefit of preventing content writers from adding things they shouldn't.
Create an RTE for data
In the back office under Settings, create a new data type. If you expect you'll need a few RTE-related types, you can group these under a folder to keep things tidier if preferred.
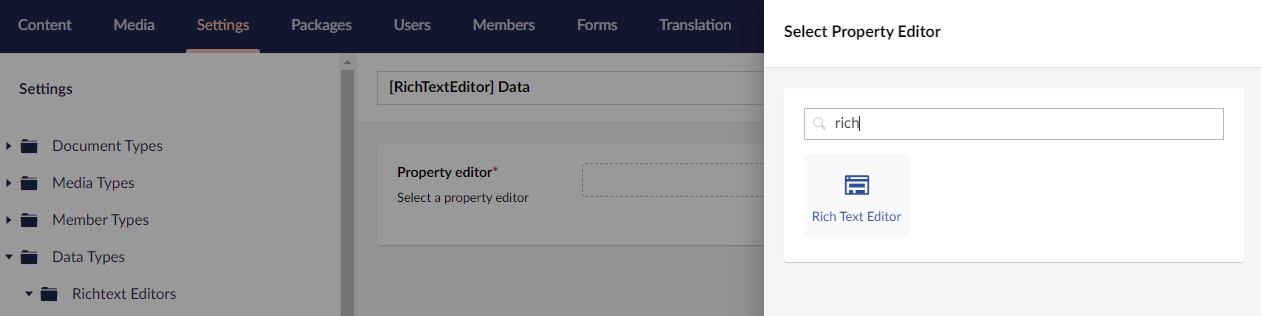
For the type name, a popular formatting convention, and one which I will follow in this article, is "[Type] Purpose", for example "[RichTextEditor] Data", open the property editor picker and select .
Once selected, a number of options will be available to configure. Many of these are self-explanatory or clarified by the tooltip, but others aren't as obvious so I'll cover them all in the table below.
| Property | Purpose |
|---|---|
| Toolbar | The formatting options available in the editor. Some options add items to the view window (e.g. table), and others manipulate a selection (e.g. bold) |
| Stylesheets | When published, the RTE outputs standard HTML which can be targeted by CSS rules. If you want to apply custom styles to an individual RTE, you can select which file(s) should be used here |
| Dimensions | Set the maximum dimensions of the editor window. The height defaults to the full height of the content if unspecified. |
| Maximum size for inserted images | Applies a max-width to inserted images - there's an option to disable this restriction as you'll often prefer to control this with CSS |
| Mode |
Classic: standard view with the toolbar across the top of editor window |
| Overlay Size | Set how much of the screen is covered by overlays such as the link picker. Options are Small, Medium and Large, which fill roughly 1/3, 2/3 and the full screen respectively |
| Hide Label | Hide the property label which appears to the left of the RTE. It's worth hiding labels on document types which only have one RTE or where the purpose is obvious as this gives editors more horizontal space |
| Image Upload Folder | Specifies the upload location of images which are pasted directly into the RTE, rather than inserted using a media picker |
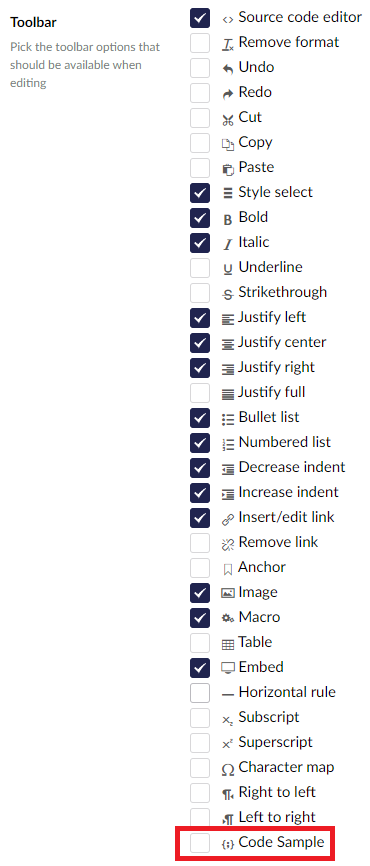
For the Toolbar options, our example editors who will be using this RTE will only need to add tabular data, and images for charts etc., so deselect everything except for Image and Table, then press .
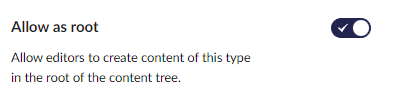
If you don't already have any document types, create a new one with a template, and change the permissions to either allow at root, or alternatively, ensure the parent node (e.g. a home page) has permissions to create this document type as a child node.
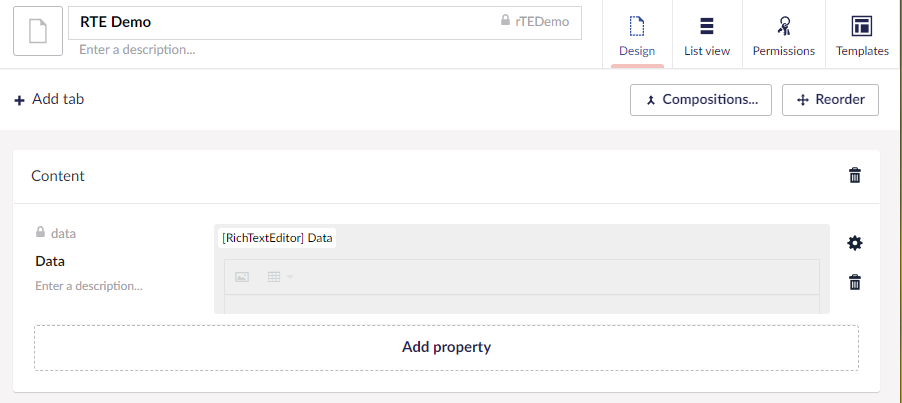
Within this document type, Give the property group a name, such as "Content", then add a property called "Data" and select your new [RichTextEditor] Data data type from the editor picker, then press Submit, then Save.
Navigate to the templates section and add the following to your document type's template to generate the RTE block.
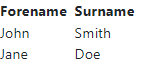
@Model.Value("data")Go to the Content section and create a new item for this document type, create a table with some data, "Save and publish", then navigate to the URL of the new page.
Create an RTE for articles
This is where it gets more interesting (and complex). Head to https://www.tiny.cloud/docs/plugins/ and have a look through the array of plugins available - we'll be working with "Code Sample" because this RTE will be used for a tech blog which will include lots of code snippets. The examples in the documentation work by initialising JavaScript objects - Umbraco configuration is a little different, but the properties are named the same, so you can still use the TinyMCE documentation to help configure your RTEs.
Create another datatype, "[RichTextEditor] Article" and add a property to your document type and make sure it's referenced in the CSHTML template in the same manner described above Create an RTE for data section.
Open up Visual Studio and find the appsettings.json. Add the following within the Umbraco > CMS object block:
"RichTextEditor": {
    "Commands": [
      {
        "Alias": "codesample",
        "Name": "Code Sample",
        "Mode": "Insert"
      }
    ]
}
Run the application, navigate to your new article RTE data type, and you should see the "Code Sample" option available in the toolbar options.
If you check this option, hit Save, then navigate to your Content section you'll notice that the Code Sample option isn't showing on the toolbar, this is because you need to add it to the plugins list.
Back in appsettings.json, add the following after the "Commands" block, re-run the application and you should see the toolbar option.
"Plugins": [
  "codesample"
]
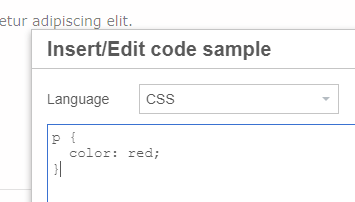
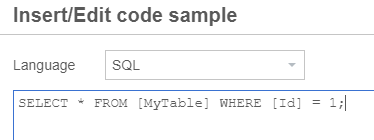
Click on the button and a simple popup with language selection and text entry will be shown. Add some code, hit OK and you'll see the block showing in the RTE with syntax highlighting.
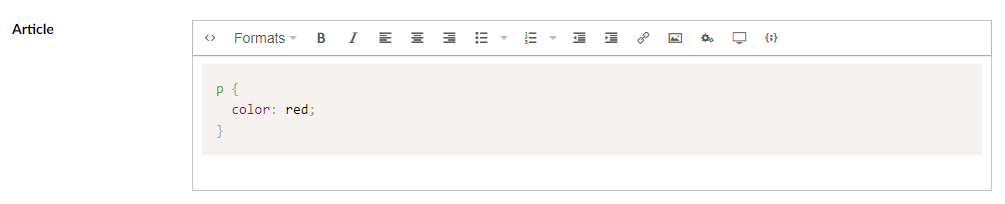
If you "Save and publish" and view the page, you'll notice that the code block is shown, but there's no syntax highlighting. Since Umbraco is a headless CMS, there aren't any front-end libraries included to handle the logic. This is covered in the next section, Add PrismJS libraries.
You may have noticed that several language options are included in the editor by default, such as HTML, CSS and JavaScript, but if you don't need as many options, or if you want to add a few more, this can also be customised.
Back in appsettings.json, add the following block after the "Plugins" object:
"CustomConfig": {
  "codesample_languages": "[{\"text\": \"C#\",\"value\": \"csharp\"},{\"text\": \"CSS\",\"value\": \"css\"},{\"text\": \"SQL\",\"value\": \"sql\"}]"
}
The "CustomConfig" object allows you to fine-tune the plugin options, details of which can be found in the documentation for each plugin, under the "Options" section (e.g. https://www.tiny.cloud/docs/plugins/opensource/codesample/#options)
In the snippet above, we're only going to allow C# and CSS which were available initially, and we'll add SQL. The "text" is what will be shown to content editors in the drop-down list, and the "value" ties in with how the syntax highlighting is handled in the next section. NB. you won't always get syntax highlighting in the back office for custom languages.
Add the PrismJS library
PrismJS is a JavaScript and CSS library used for syntax highlighting. It's referenced in the Umbraco RTE configuration documents, and is popular due largely to its ease of use, and large selection of languages - supported languages, along with aliases used for appsettings config (e.g. the alias for C# is "csharp") can be found on https://prismjs.com/index.html#supported-languages.
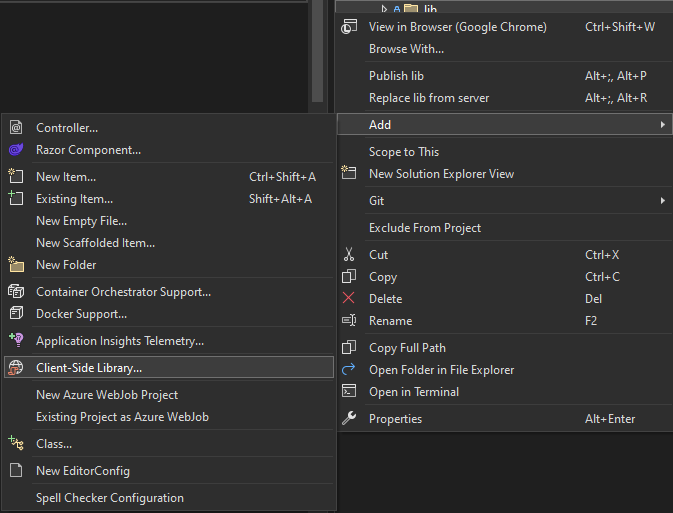
We'll use the Visual Studio library manager to install this library. So, in Visual Studio, right click the "wwwroot" node and add a folder, I tend to call mine "lib" as it seems to be a popular convention. Right click this folder and select "Add Client-Side Library..."
Prism can be found on several providers, but we'll use "cdnjs". Search for "prism", and "Choose specific files" - it's a large library and we only need some of the files.
Check the following options and click "Install":
- prism.min.js
- themes/prism.min.css
- plugins/show-language/prism-show-language.min.css
- plugins/show-language/prism-show-language.min.js
- components/prism-csharp.min.js
- components/prism-css.min.js
- components/prism-sql.min.js
After the files are added, you'll notice another file was added (or edited if you already had one in the project), libman.json, right click this file and "enable restore on build".
Open the CSHTML template which will contain your code sample RTEs (or your Master page), and ensure all of the JS and CSS files are referenced in the correct places (i.e. CSS in the <head>, and JS just before the </body> closing tag).
<link href="~/lib/font-awesome/css/brands.min.css" rel="stylesheet" />
<link href="~/lib/font-awesome/css/solid.min.css" rel="stylesheet" />
<link href="~/lib/prism/themes/prism.min.css" rel="stylesheet" />
<link href="~/lib/prism/plugins/show-language/prism-show-language.min.css" rel="stylesheet" />
<link href="/css/styles.min.css" rel="stylesheet" />
...
<script src="~/lib/prism/prism.min.js"></script>
<script src="~/lib/prism/plugins/show-language/prism-show-language.min.js"></script>
<script src="~/lib/prism/components/prism-csharp.min.js"></script>
<script src="~/lib/prism/components/prism-css.min.js"></script>
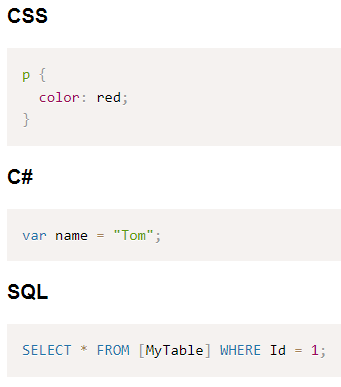
<script src="~/lib/prism/components/prism-sql.min.js"></script>Build and run your project, navigate to your page with the code sample RTE and you should see the syntax highlighted.
Add custom style formats to the toolbar
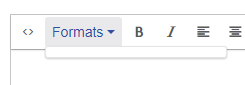
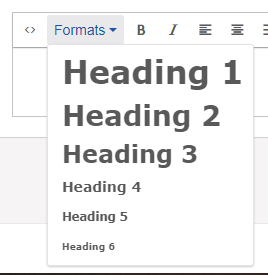
By this point, you may have noticed the "Formats" toolbar option, which appears in the RTE by default. You may also have noticed that it's an empty list.
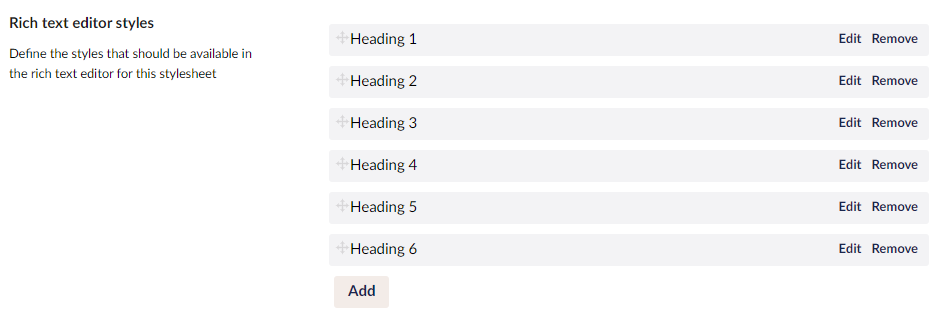
A common RTE option, which is inexplicably missing from this editor, is the ability to define headings. In this section we'll add the typical h1-h6 heading options to this list, including some custom styling.
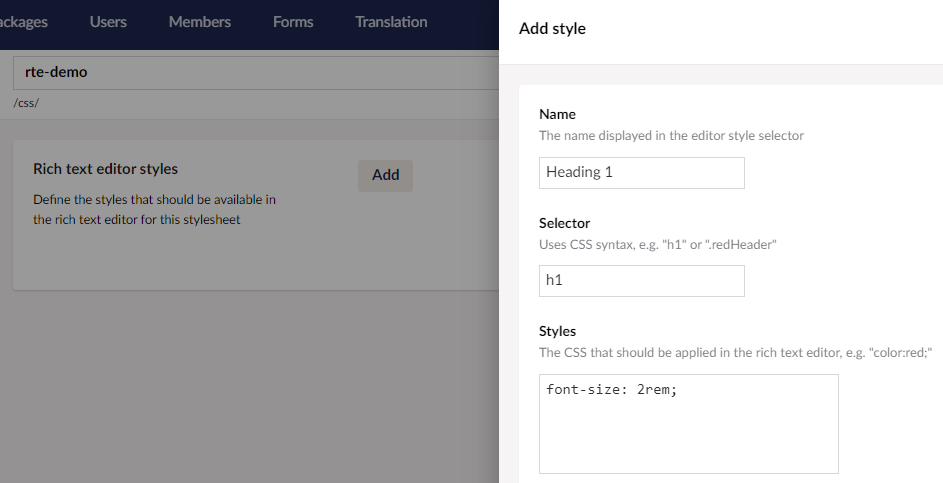
In the back office, go to "Settings", then under "Templating" right click "Stylesheets", "Create...", then "New Rich Text Editor style sheet file". Give the new file a name, then hit "Add" to create a new rule, filling in the fields with an appropriate Name, Selector, and any applicable styles rules you wish to apply.
Repeat this for the remaining headings and hit "Save".
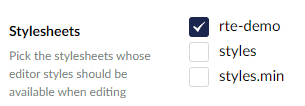
Under Data Types, find your RTE, check your new stylesheet to add the formats to the editor and press "Save".
Finally, go to your page Content and check that the RTE has the formats you added.
Further customisation
We've only scratched the surface on the amount of customisation available with the RTE. I'll go over a few more useful bits here, but the full options can be found in the TinyMCE documentation.
Automatically generate a table of contents
Once you have an RTE property with a series of headings and text, you may find, especially with longer content such as a blog post, that visitors would benefit from a table of contents to navigate to the sections they're most interested in. In this section we'll add the "Table of contents" plugin, which automatically generates a list of page anchors based on the semantic headings we added in the previous section.
Note: The table of contents plugin is only able to generate anchors for headings used in the same RTE property.
Similar to the Code Sample plugin, we'll need to add some configuration to the appsettings.json, full details of the table of contents plugin configuration can be found here.
"Commands": [
  {
     "Alias": "toc",
     "Name": "Table of contents",
     "Mode": "Insert"
   }
],
"Plugins": [
  "toc"
]
The default table of content depth is 3 items, so if we had a H1, containing sub-headings going all the way down to H6, the plugin would only generate down to H3. The depth can be configured by adding the following to "CustomConfig"so that all of our headings are included:
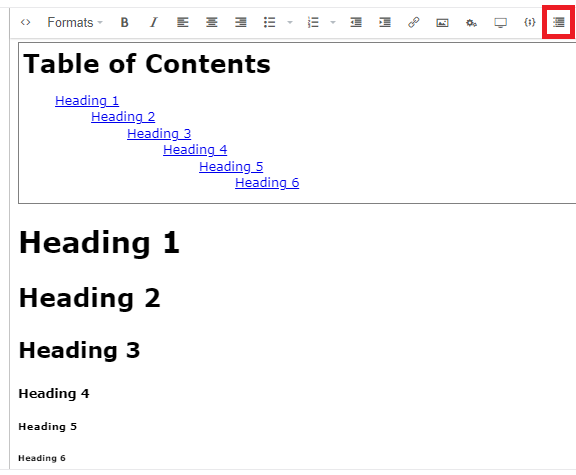
"toc_depth": "6"Run your application, add the "Table of contents" option to your RTE configuration toolbar options.
Navigate to your Content page, add a few headings from the format options, or manually using the source code editor, then click the toolbar button to generate the table of contents.
Customise table attribute defaults
Being able to add elements like tables in the RTE is great for content editors, but these will be added without any custom styling or classes, unless the elements are targeted directly with CSS rules.
Bootstrap is a popular CSS library which uses classes to style elements. In this section we will customise the default table behaviour to include a class which will apply Bootstrap styling to all tables - full options for table configuration can be found here.
In appsettings.json, add the following two properties to the CustomConfig block:
"CustomConfig": {
  "table_default_attributes": "{\"class\": \"table\"}",
  "table_default_styles": "{}"
}
The first will add the "table" Bootstrap class, and the second will remove any styling which is added automatically by the RTE. Make sure your template contains a reference to the Bootstrap library (use the client-side library option to install locally, or link to a CDN link:
<link href="https://cdn.jsdelivr.net/npm/bootstrap@5.2.3/dist/css/bootstrap.min.css" rel="stylesheet" integrity="sha384-rbsA2VBKQhggwzxH7pPCaAqO46MgnOM80zW1RWuH61DGLwZJEdK2Kadq2F9CUG65" crossorigin="anonymous">Run the application and your table will contain basic styling.