Introduction
If, like me, you host Windows or Linux AWS EC2 instances which run one or more .NET applications, then chances are you’d like to be able to see details of any errors which may arise in your applications, without having to log in remotely to view log files, or hope that the error can just as easily be replicated in your local development environment. This is where CloudWatch comes in, and it’s very simple to configure.
Assumptions
- Moderate familiarity with .NET Core or .NET 5+
- An EC2 instance with your application already set up
- An AWS account with access to the console, permissions to edit IAM roles and create CloudWatch log groups
Steps
- Add the applicable package to your application via NuGet
- Configure the application to include logging
- Configure the log group in AWS
- Add a CloudWatch policy to the EC2 instance’s role
- Configure the application to reference your new log group
- Add logging to a class using dependency injection
- Publish your application
Add the applicable package to your application via NuGet
Add the AWS.Logger.AspNetCore package to the project which you want to include logging on, via right click -> Manage NuGet packages…

Configure the application to include logging
Go to your Program.cs and configure the application to add the AWS logging provider
using Microsoft.Extensions.Logging;

// ...

public static void Main(string[] args) => CreateHostBuilder(args).Build().Run();

public static IHostBuilder CreateHostBuilder(string[] args) =>
    Host.CreateDefaultBuilder(args) .ConfigureLogging(logging =>
        {
            logging.AddAWSProvider();
        })
        .ConfigureWebHostDefaults(webBuilder =>
            webBuilder.UseStartup<Startup>()
        );
Configure the log group in AWS
Log into AWS Console, and navigate to the Log groups section within CloudWatch.

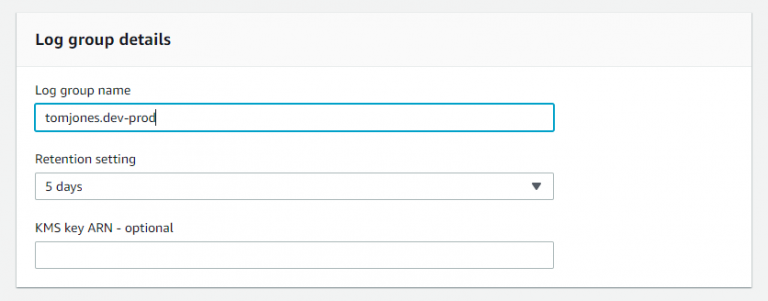
Hit , then create a new log group with a meaningful name and sensible retention period.

Although each log entry takes up a negligible amount of space, you will need to consider how much data you will be logging, and how long you intend to retain that data to ensure that you don’t end up needlessly filling up storage space.
If you make a habit of checking errors regularly, or intend to set up alarms to notify you of serious errors, a low retention should be sufficient. The log levels chosen later on will also impact the how much data is logged.
Add a CloudWatch policy to the EC2 instance’s role
Remaining on the AWS console, navigate to the Identity and Access Management (IAM) service, and select Roles from the side navigation, then click on the role which was assigned to your EC2 instance when the it was first created.

Under the role’s Permissions tab, hit the button.
There are a vast array of AWS managed policies listed here, and you can be as selective as necessary, however to keep things simple, just filter the list to find “CloudWatchFullAccess”. You can view the details of this policy by expanding the section, and once you’re happy, check the box and hit Attach policy.

Configure the application to reference your new log group
Return now to your application, navigate to your appsettings.json and add the Region and LogGroup properties, with values appropriate to your instance’s region and new log group name.
"Logging": {
  "Region": "eu-west-2",
  "LogGroup": "tomjones.dev-prod",
  "LogLevel": {
    "Default": "Information",
    "Microsoft": "Warning",
    "Microsoft.Hosting.Lifetime": "Information"
}
Add logging to a class using dependency injection
Navigate to one of your application’s classes, I’ll just use the boilerplate HomeController for this example. Create a private field for the injected logger and assign the field via the class constructor, then call one of the logger’s methods in one of the action methods.
using Microsoft.Extensions.Logging;

// ...

private readonly ILogger<HomeController> _logger;

public HomeController(ILogger<HomeController> logger)
{
    _logger = logger;
}

public IActionResult Index()
{
    _logger.LogInformation($"Returning view: {nameof(Index)}"); return View();
}
Publish your application
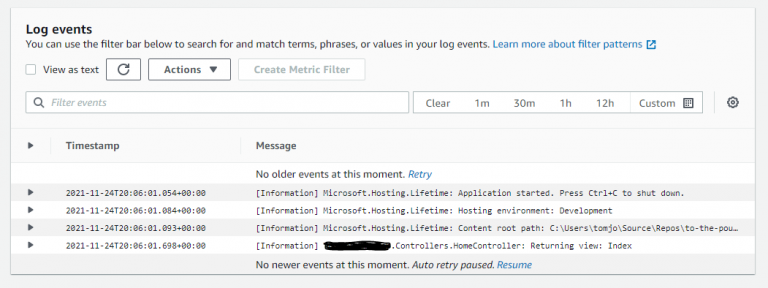
Navigate to the section which will trigger logging (in my case the home page), and verify that the log message reaches CloudWatch by checking the most recent “Log streams” within the newly-created log group.
